Monday Mini – Quick Card Made with Squares of DSP
Quick cards do not need to look like they are quick! There are so many cards that look great and look like they took a lot of time when they did not. That’s what led me to my new series, Monday Mini. Every Monday I plan to bring you a card that takes around 10 minutes but looks like it takes a lot more time.
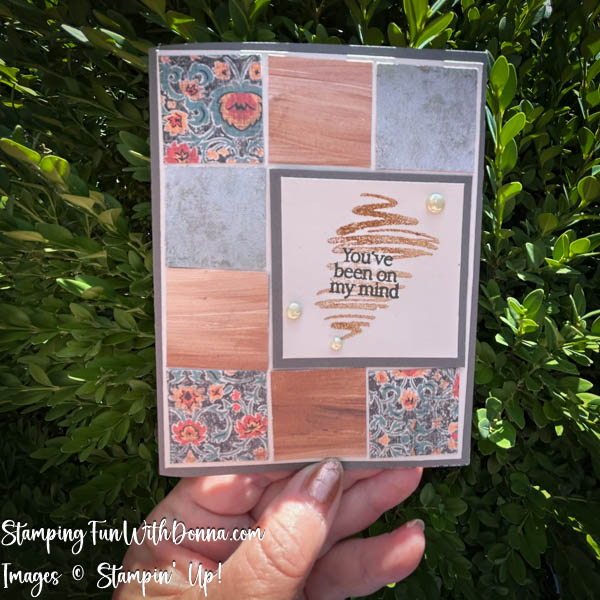
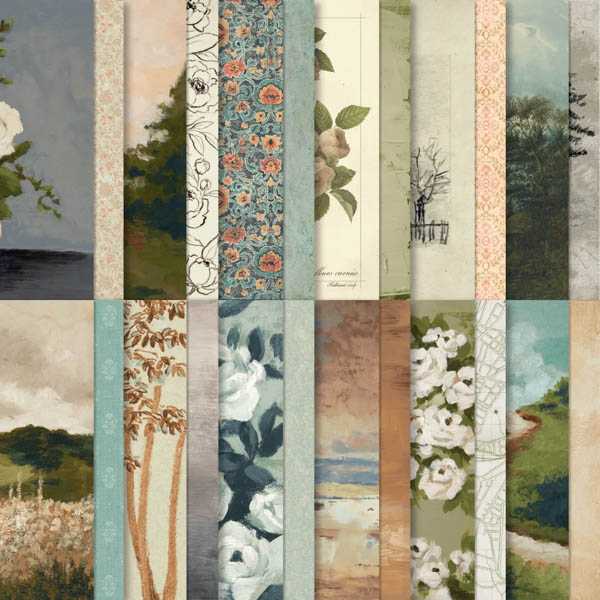
These cards look fantastic but are quite quick and simple to put together.The aptly named Beautiful Gallery Designer Series paper is the star here. I have used it in cards, scrapbook pages, and 3D projects. Check it out – it’s such a great paper pack, and you get so much paper with 6×6 designer series paper – this pack has 48 sheets, 4 each of 12 gorgeous designs.
I chose two papers for this card, and used both sides of one piece. I cut the paper into 1 1/4″ squares. You need 8 squares, so cut 3 of two patterns and 2 of the third pattern. You only need a little from each paper. Cut a regular card base from basic gray card stock, cutting one sheet of cardstock in half horizontally and then folding it vertically, to create a 5 1/2″ x 4 1/4″ card. Cut a piece of basic beige to 5 1/4″ x 4″.
You need to glue the squares to the piece of basic beige, framing three of the four sides. I like to place the corner pieces first to make it easier to add the middle pieces in the right spots. Alternate DSP squares to get an interesting design. When they are placed like that, there will be a space open equal to four squares. In that open spot, add a 2 1/2″ square of basic gray. Take a 2 1/4″ square of basic beige and stamp your image and sentiment. Above I used pecan pie for the image and basic gray for the sentiment. Glue them together with green glue. Add 2026-29 In Color Dots. Voila!
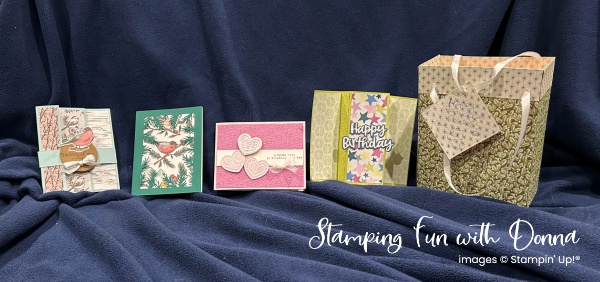
Here are some alternates with the same design.
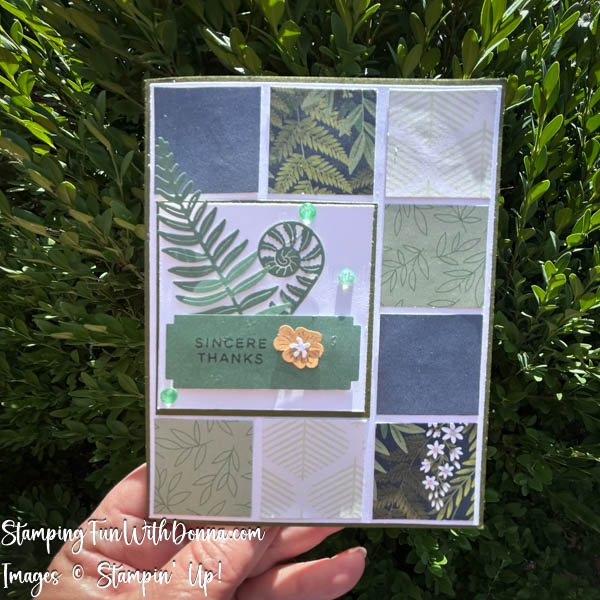
You can place the squares so that the open spot for the stamping is on the left (as here) or the right (as above). Here I used Moonlit Flora DSP and Fern and Flora bundle. I placed the sentiment on a die cut, decorated with other die cuts and embellishments, and popped it up with dimensionals.
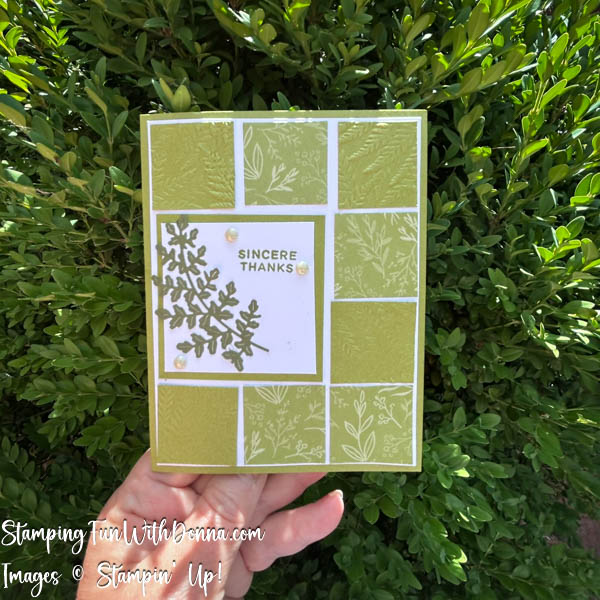
Here is one I made alternating squares from Moonlit Flora DSP and squares of Old Olive that I ran through the Stampin’ Cut and Emboss Machine with the Fern and Flora embossing folder. You can decorate the squares any way you want.
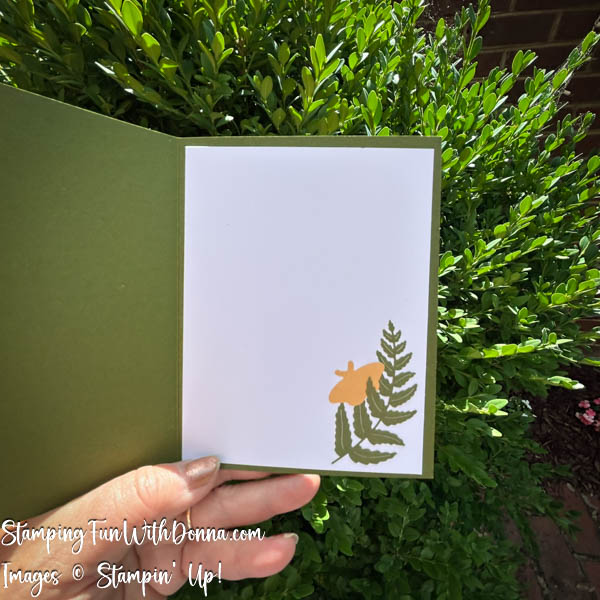
I love decorating the inside of the card to match the outside, using stamps, die cuts, or embossing folders. It add a little something extra.
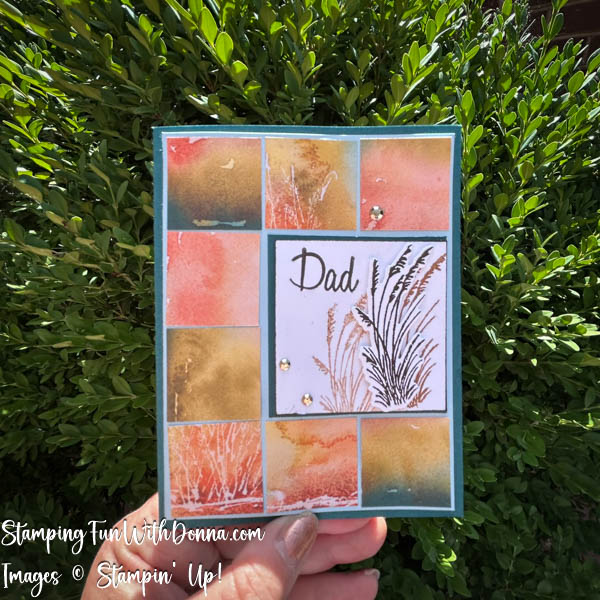
You can do them anyway you’d like! For this one, I used Thoughtful Journey DSP and stamped directly on the 2 1/4″ square using the Relaxing Waterside bundle. I stamped one cattail in pecan pie, then without reinking stamped a second overlapping second-generation image. I then stamped the same image in early esspresso and cut it out using the die.
Which do you like best? Give it a try and let me know how it goes! I’d love to see your creations.
Happy Stamping!
Donna